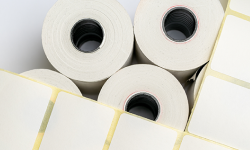
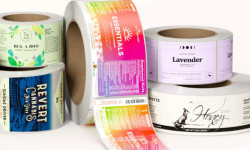


Custom labels need precise artwork setup to look professional. An artwork bleed ensures your printed labels have clean, edge-to-edge color without unintended white borders.
This article covers what a label bleed is, why it's crucial, and how to set up and submit your artwork correctly.
Understanding Artwork Bleeds: Essential Tips for Perfect Labels
What is an Artwork Bleed?
Definition and Importance of Bleeds
An artwork bleed is the area around your label design that extends beyond the trim edge. This extra margin, usually 1/8 inch (0.125 inches), ensures that the design or background color runs to the edge of the label after cutting.
Importance of Bleeds:
- Prevents White Edges: Ensures no white edges are visible after trimming.
- Allows for Cutting Tolerance: Compensates for minor cutting variations.
- Professional Finish: Provides a polished and complete look.
Common Issues Without Proper Bleeds
Without proper bleeds, your printed labels might have uneven edges, visible white borders, or misaligned graphics, all of which detract from the professional appearance of your product labels.
Why Bleeds Are Crucial for Custom Printed Labels
Ensuring Clean Edges
Bleeds make sure your labels have clean, edge-to-edge color. This is essential for creating a seamless look, especially on designs with backgrounds that need to reach the label’s edge.
Avoiding Unintended White Borders
A correctly set bleed prevents unintended white borders that can appear if the cutting is slightly off. This maintains the integrity of your design.
Enhancing Overall Print Quality
Using bleeds enhances the overall print quality by allowing for precise cuts and ensuring the final product matches your design intentions.
How to Set Up Your Artwork with Bleeds
Standard Bleed Measurements
The standard bleed measurement for labels is typically 1/8 inch (0.125 inches) beyond the final trim size. This ensures there’s enough extra space around the design to accommodate cutting.
How to Calculate the Correct Bleed Size
To calculate the correct bleed size, add 0.25 inches to both the height and width of your label design. For example, if your label size is 3 inches by 4 inches, the design including bleed should be 3.25 inches by 4.25 inches.
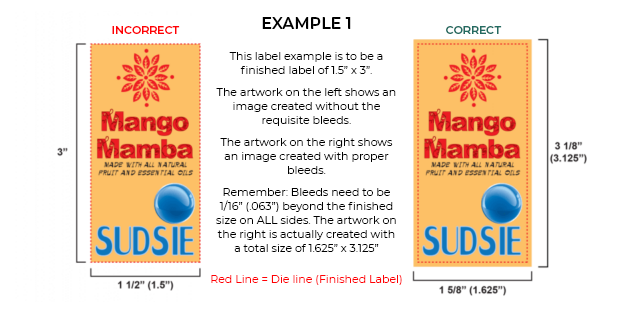
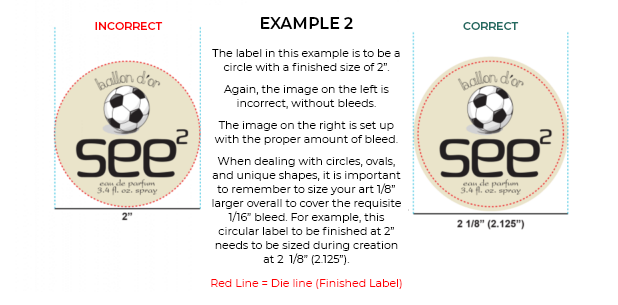
Example Calculations and Additional Visuals
- Original Label Size: 3 inches by 4 inches
- With Bleed: 3.25 inches by 4.25 inches
Visualize your design with a 0.125-inch bleed on each side to ensure all critical elements stay within the safe zone.
Best Practices for Preparing Your Artwork
Best Practices for Preparing Your Artwork
Using Design Software to Add Bleeds
Most design software, like Adobe Illustrator or Photoshop, allows you to add bleeds during the setup of your document. Look for bleed settings in the new document setup window and input the standard bleed size.
Ensuring Important Elements Stay Within Safe Zones
While the bleed ensures your background extends to the edge, critical elements like text and logos should stay within the safe zone, typically 1/8 inch inside the trim line, to avoid being cut off.

Checking Your Work Before Submission
Before submitting your artwork, double-check that the bleeds are correctly set up, and all critical elements are within the safe zones. Use print preview tools in your design software to verify.
Submitting Ready-to-Print Artwork
File Formats and Specifications
Submit your artwork in high-resolution file formats like PDF, AI, or EPS. Ensure that the file includes the bleed and crop marks for precise trimming.
Communicating with Your Printer
Communicate clearly with your printer about your bleed settings and any specific requirements. Providing a print-ready file with correct bleeds helps avoid delays and errors.
Using Templates and Guides
Use templates and guides provided by your printer to ensure your artwork meets their specifications. These resources help streamline the setup process and ensure accuracy.
Common Mistakes and How to Avoid Them
Forgetting to Add Bleeds
Always remember to add bleeds when setting up your artwork. Without bleeds, your design might not extend to the label's edge, resulting in white borders.
Incorrect Bleed Sizes
Ensure you use the correct bleed size, typically 0.125 inches. Using the wrong size can result in improper trimming and a less professional finish.
Misplacing Text and Important Design Elements
Keep all critical elements within the safe zone, away from the trim line. Misplacing text and graphics too close to the edge risks them being cut off.
FAQs
What is the standard bleed size for labels?
The standard bleed size for labels is 1/8 inch (0.125 inches) beyond the trim edge.
How do I add bleeds in my design software?
In your design software, add bleeds during the new document setup by specifying the bleed size, usually 0.125 inches.
What happens if I don't include bleeds in my artwork?
Without bleeds, your labels might have white edges or uneven trimming, affecting the professional appearance.
Can I adjust the bleed size after the design is complete?
Yes, you can adjust the bleed size after the design is complete, but it’s best to set it up correctly from the beginning to avoid extra work.
Are there any tools to help ensure my bleeds are correct?
Design software like Adobe Illustrator and Photoshop offer tools to add and check bleeds. Templates from your printer can also help ensure accuracy.
Wrapping Things Up
Understanding and correctly implementing artwork bleeds is crucial for producing high-quality custom labels.
By following the best practices outlined in this guide, you can avoid common mistakes and ensure your printed labels have a professional, polished look. For high-quality custom printed labels, visit Wizard Labels.