

Labels not sticking properly can be a frustrating issue for many businesses. Whether you’re dealing with peeling corners or entire labels coming off, understanding the root causes and solutions for poor label adhesion is crucial. This guide will help you identify common problems and provide practical tips to ensure your labels stay firmly in place.
Why Don't My Labels Stick Properly to My Products? Tips and Solutions
Common Causes of Poor Label Adhesion
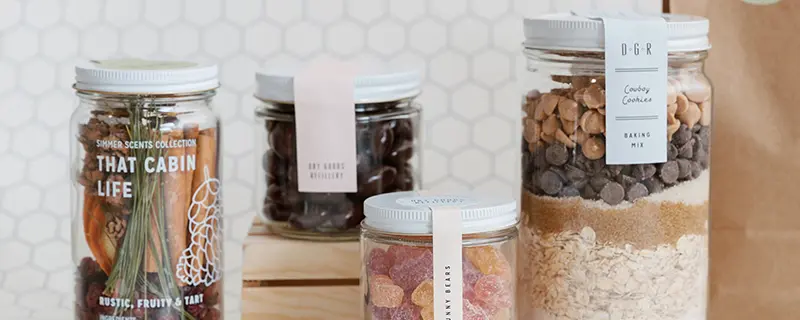
Container Type
The type of container you use can significantly impact label adhesion. Different materials have varying levels of compatibility with adhesive labels.
- Plastic Containers: Smooth and often easier for labels to stick to, but some plastics have low surface energy that repels adhesives.
- Glass Containers: Generally offer good adhesion but require clean, dry surfaces.
- Metal Containers: Similar to glass but may need a different type of adhesive for optimal sticking.
Surface Corruption
Contaminants on the container surface can interfere with the adhesive, preventing the label from sticking properly.
- Oil and Grease: Common in manufacturing environments, these substances can create a barrier between the label and the container.
- Dust and Dirt: Even small particles can cause significant adhesion issues.
- Moisture: Wet or damp surfaces can prevent the adhesive from bonding properly.
Application Method
How you apply the labels can also affect their ability to stick.
- Hand Application: Inconsistent pressure and positioning can lead to poor adhesion.
- Machine Application: While generally more reliable, machines need to be calibrated correctly to apply the right amount of pressure.
Understanding Adhesion: It's Not Always the Label's Fault
The Role of Material Quality
The quality of the label material and adhesive plays a significant role in adhesion. High-quality materials are more likely to provide consistent and reliable adhesion.
- Adhesive Type: Different adhesives are designed for different surfaces and conditions. Ensure you’re using the right type for your specific container.
- Label Material: Durable materials like BOPP (biaxially oriented polypropylene) are often more reliable for a variety of surfaces.
Vendor Reliability
Choosing a reliable label vendor is crucial. High-quality labels from reputable vendors are less likely to have adhesion issues.
- Consistent Quality: Reliable vendors provide consistent quality, ensuring that each batch of labels performs as expected.
- Customer Support: Good vendors offer support and advice on choosing the right labels for your needs.
Evaluating Your Container Type for Better Adhesion
Best Surfaces for Adhesion (Plastic, Glass, Flat Box Materials)
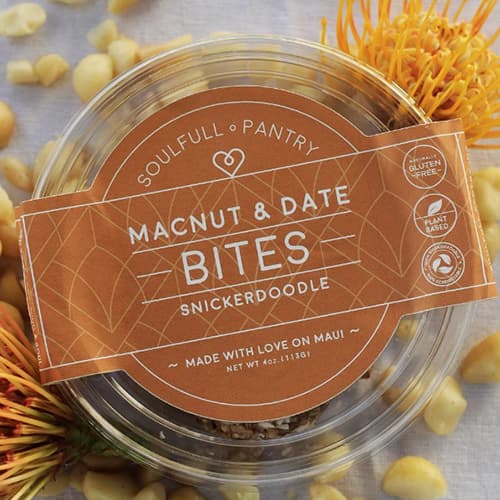
Certain surfaces are naturally better for label adhesion. Smooth, clean surfaces like plastic, glass, and flat box materials generally allow for better sticking.
- Plastic: Works well with a variety of adhesives, particularly smooth plastics.
- Glass: Excellent for adhesion but must be clean and dry.
- Flat Box Materials: Ideal for labels, especially those with a smooth finish.
Challenging Surfaces (Corrugated Cardboard, Fabrics, Rough Surfaces)
Some surfaces are inherently challenging for label adhesion due to their texture and composition.
- Corrugated Cardboard: The uneven surface can make it difficult for labels to stick properly.
- Fabrics: Labels generally do not adhere well to textile surfaces.
- Rough Surfaces: Any surface with significant texture can reduce adhesive contact and lead to poor adhesion.
Testing Labels on Different Containers
It’s important to test labels on your containers before committing to a large order. This helps ensure compatibility and identifies any potential adhesion issues.
- Test Runs: Apply a few labels to different containers and observe the results over time.
- Environmental Testing: Expose the labels to the conditions they will face in real use (e.g., moisture, temperature changes) to ensure durability.
The Impact of Surface Cleanliness on Label Adhesion
Cleaning Containers Thoroughly
Properly cleaning your containers before applying labels is crucial for good adhesion.
- Cleaning Agents: Use appropriate cleaning agents that do not leave a residue.
- Drying: Ensure containers are completely dry before applying labels.
Identifying Invisible Contaminants
Invisible contaminants like oils and silicones can significantly impact adhesion. Use suitable cleaning methods to ensure these are removed.
- Alcohol Wipes: Effective for removing oils and residues.
- Inspection: Regularly inspect surfaces for cleanliness before labeling.
Importance of Cleanliness in Product-Filled Containers
If containers are filled before labeling, ensure the filling process does not contaminate the surface.
- Sealed Containers: Use sealed containers to prevent spillage and contamination.
- Handling Procedures: Implement strict handling procedures to maintain cleanliness.
Optimizing the Label Application Process
Machine Applicators vs. Hand Application
Choosing between machine applicators and hand application depends on the scale and precision required.
- Machine Applicators: Ideal for large-scale production, offering consistent pressure and placement.
- Hand Application: Better for small batches or custom applications but requires careful handling.
Minimizing Human Contact (Wearing Cotton Gloves)
Minimizing direct human contact with labels can prevent oils and contaminants from affecting adhesion.
- Cotton Gloves: Wear cotton gloves to handle labels and containers.
- Tools: Use tools like tweezers or applicators to minimize contact.
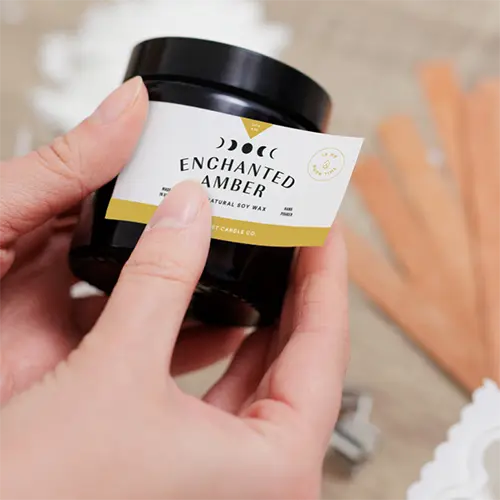
Tips for Effective Hand Application
If applying labels by hand, follow these tips to ensure better adhesion.
- Consistent Pressure: Apply even pressure across the entire label.
- Smoothing Tools: Use a squeegee or roller to smooth out the label and remove air bubbles.
- Proper Alignment: Take your time to align the label correctly before pressing it down.
Tips for Testing and Ensuring Strong Adhesion
Allowing Adhesives to Set Properly
Give the adhesive time to bond with the container surface properly.
- Setting Time: Allow labels to sit undisturbed for a specified period to ensure strong adhesion.
- Environmental Conditions: Keep the labeled products in a controlled environment to aid the setting process.
Repositioning Labels Before Setting
Some adhesives allow for repositioning before they set. Use this feature to ensure proper placement.
- Adjustable Adhesives: Choose labels with adhesives that allow repositioning.
- Careful Handling: Gently reposition labels as needed before the adhesive sets.
Identifying and Addressing Bubbles
Bubbles under labels can lead to poor adhesion and a subpar appearance. Address them promptly.
- Squeegee Use: Use a squeegee to smooth out bubbles immediately after application.
- Pin-Prick Method: For stubborn bubbles, gently puncture with a pin and smooth out.
FAQs
How can I clean my containers effectively before applying labels?
Use appropriate cleaning agents like alcohol wipes, ensure surfaces are dry, and inspect for any residues before labeling.
What should I do if my labels still aren't sticking?
Check for surface contaminants, ensure the correct label material and adhesive are used, and verify proper application techniques.
Are there specific labels better suited for certain container types?
Yes, different labels work better on certain surfaces. For example, BOPP labels are great for plastics, while paper labels may be suitable for flat box materials.
Can I get samples to test before placing a large order?
Yes, at Wizard Labels, we offer samples to help you test and ensure compatibility before committing to a larger order.
Ready to Order Custom Labels?
Ensuring your labels stick properly is crucial for product presentation and durability. At Wizard Labels, we specialize in high-quality custom labels tailored to your needs. Visit our custom labels page to get a custom quote today and learn more about the best materials for your labels.